# Website Design & Communication
Web Design Tips: Choose and Size Images for Your Municipal Website
Tips and resources to optimize your digital images.

CivicPlus
August 31, 2018
10 min
Images are powerful pieces of digital content. When used wisely, they can be more impactful in motivating behavior than a page of text. As humans, our minds are simply wired to process images and associate them with emotions, sensations, and memories more quickly than text. While our brains decode text in a linear, sequential manner, they decipher images instantly. What that means, is that your brain interpreted the header image associated with this blog, faster than it could read the ten-word title. In fact, according to researchers, 90 percent of information transmitted to the brain is visual, and our minds process images 60,000 times faster than text.
What does all this mean for you as a local government website administrator? It means the importance of choosing photos for your government website design and sizing them to optimally display can not be stressed enough. According to the Nielsen Group, the majority of users decide if they want to stay on your website within the first 10-20 seconds of viewing. Even in the public sector, the imagery you use will impact the behavior of residents and visitors, and will impact how credible they view your website to be, how much time they spend there, and how likely they are to return.
To help you choose the most emotive, impactful, and relevant photos for your local government website, and then size them appropriately, we’ve compiled tips from our internal website design and content experts. Having launched over 3,500 local government websites, many of which have earned communities awards and recognition, we’d like to share our knowledge and help you ensure your website makes an instantaneous impression on your visitors.
Part I: How to Re-Size Photos For Your Digital Channels
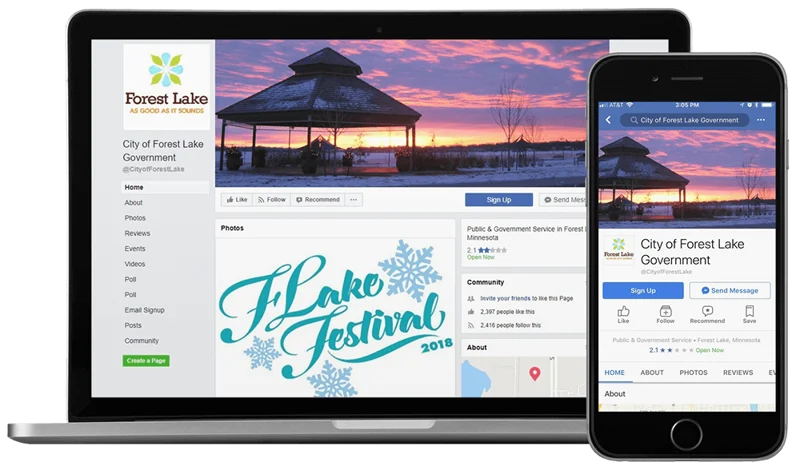
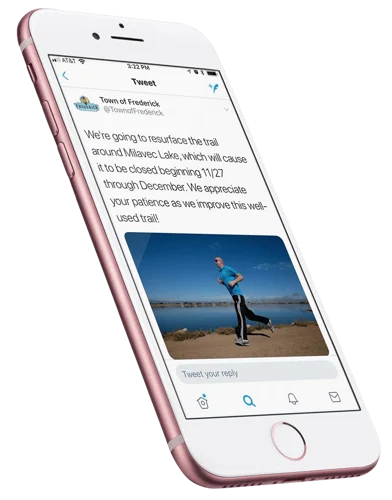
74 percent of social media marketers use visual assets in their social media marketing. Why? They know the impact that images have on informing and engaging visitors. They know that when people hear information, they’re likely to remember only 10 percent of it three days later, but when a relevant image is paired with that same information, people retain 65 percent of the information three days later. Incorporating beautiful, unique, local imagery into your social media posts should be an impactful aspect of your social media strategy.
It’s essential to understand, however, that if you choose engaging photos for your social media pages, but they are not sized to display ideally within the selected social media platform, they will not be nearly as effective as they should be. To help you get the most out of your photo assets, we’ve provided tips for the ideal photo sizes to use within the most common social platforms used by local governments: Facebook, Twitter, Instagram, and Pinterest. We have also provided suggested tools to help you quickly and effectively re-size your images, regardless of your technical or graphic design experience.
Ideal Image Specs for Your Local Government Website
Follow these guidelines when choosing images for your local government website:
- Minimum photo width: 2200 pixels.
- Approximate photo size: 1 MB or larger.
- Resolution: 72 dpi or higher.
- Color mode: RGB or CMYK.
- Preferred file types: JPEG, JPG, TIFF, PSD, or PNG.
- Non-manipulated imagery will yield the best results. If possible, choose photos without Photoshop effects or cropping.
- Good images have an area of interest. Include simple shapes and create an impression or elicit emotion.
- Choose images relevant to any season.
Ideal Image Sizes for Facebook
As of the time of this post’s publishing, Facebook supports the following dimensions for its photo placements:
- Profile Photo: Photos are displayed as 160 px X 160 px. However, all photos are compressed by Facebook. To minimize the risk of your picture losing clarify and becoming fuzzy or pixelated, Facebook recommends that you upload profile photos at a larger size, specifically 720 px X 720 px or 960 px X 960 px.
- Cover Photos: 851 px X 315 px. Know that cover photos render differently when viewed on a desktop computer than on a mobile device. On a desktop, the viewable dimension width is 829 px. On a mobile device, the viewable dimension width is 560 px. Keep these areas in mind when considering the composition of your cover photo.
- Event Photos: 1920 px X 1080 px.
- Posts: Facebook recommends when adding images to posts to use photos that are at least 1200 px X 630 px for best results. At a minimum, use pictures that are 600 px X 315 px. At a maximum, images should not exceed 8MB in overall file size.
Save any edited images as an image file, such as a JPEG, GIF or PNG.
Ideal Image Sizes for X (formerly Twitter)
Unfortunately, X and Facebook’s recommended photo sizes are not the same, which means you’ll need to size images differently to use them on both platforms. While X does accept the uploading of images with posts, the primarily text-based nature of X requires images to be sized to accommodate its condensed viewing area for best results. The following dimensions are recommended for X images.
- Profile Picture: Displays at 200 px X 200 px, but Xrecommends uploading an image that is 400 x 400. Photos cannot exceed 2 MB.
- Header Photo: 1,500 px X 500 px. Photos cannot exceed 5 MB.
- In-Stream Post Photos: Use a 2:1 ratio, ideally 440 px X 220 px. The maximum dimensions are 1024 px X 512 px, but your photo will appear collapsed in your followers’ streams at a maximum of 506 px X 253 px. You can upload up to four images at a time, but the maximum file size is 5 MB for photos, 5 MB for animated GIFs on mobile, and 15 MB for animated gifs on a desktop.
Save any edited images as an image file, such as a JPEG, GIF, or PNG.
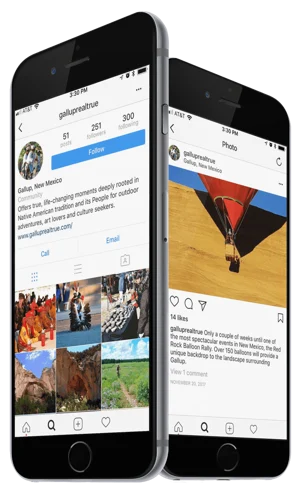
Ideal Image Sizes for Instagram
Instagram is primarily a visual platform, which means the use of beautiful, engaging, and appropriately sized images is crucial for gaining followers. From a planning and platform management perspective, keep in mind that Instagram has been designed for mobile photo uploads only. Unless you are using a social media management solution, you will need to size and upload any images from a mobile device. Use the following image sizes and dimensions for upload to Instagram.
- Posts: At least 320 px and no more than 1080 px wide. For images at the maximum 1080 px wide size, Instagram will display the full image in followers’ streams as long as the image’s height is between 566 px and 1350 px.
Save any edited images as an image file, such as a JPEG, GIF, or PNG.
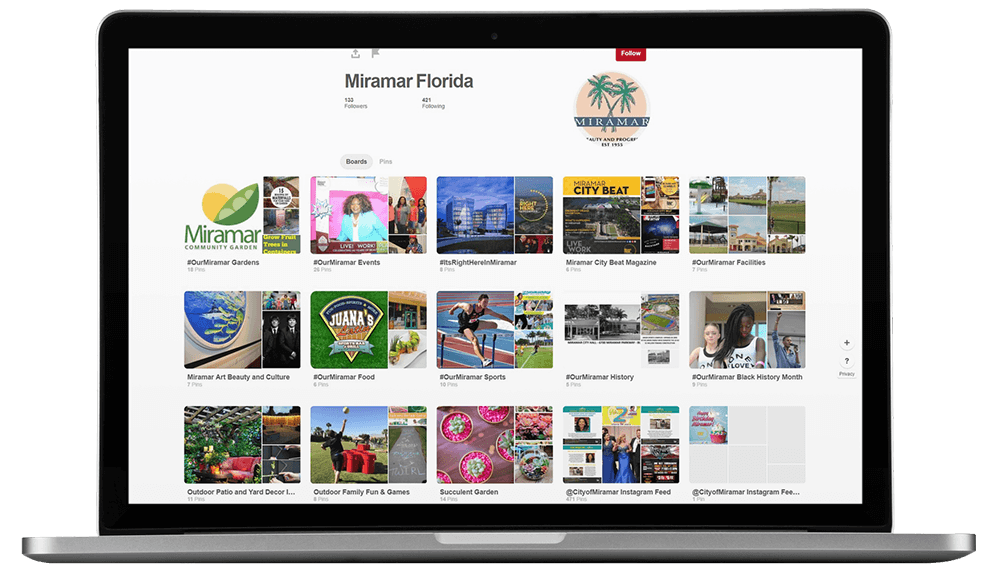
Ideal Image Sizes for Pinterest
The visual nature of Pinterest makes it an ideal tool for communities looking to promote tourism, commerce, and other local interests. Like Instagram, for the greatest possible engagement, make sure your images are appropriately sized for ideal viewing. The following sizes are recommended:
- Pins: Use an aspect ratio of 2:3 to 1:3:5. Also:
- Maximum pin width: 736 px
- For long, vertical pins, do not exceed 2061 px
- Profile Image: Photos will be displayed at 165 px X 165 px, but Pinterest recommends uploading a 600 x 600 image.
- Cover Images: Photos will be displayed at 217 px X 147 px in full size. The small thumbnails that appear below the cover image will display at 51 px X 51 px.
Save any edited images as an image file, such as a JPEG, GIF, or PNG.
Available Tools for Resizing Images
You do not need to have a graphic designer on staff to be a social media photo resizing maverick. There are a variety of tools available that can help you quickly and accurately re-size photos, regardless of your technical skill set. Consider using the following solutions:
- Landscape by Sprout Social – This free tool uses convenient drag-and-drop functionality to help non-technical users resize images for multiple social media platforms and positions in a streamlined, multi-step process.
- Pic Resize – A free and simple online tool for cropping, resizing, and adding special effects to images.
- BlogStomp – This cloud-based solution allows users to resize, collage, crop, and watermark images for use in blogs, Facebook, galleries, and other social media applications.
- Adobe Photoshop and Adobe Photoshop Lightroom – These paid software solutions provide full image resizing, retouching, and editing capabilities. Lightroom is designed for use with photos, while Photoshop allows for more significant graphic design work. If you have experience using graphic design software, these tools will allow for detailed editing and resizing.
- Microsoft Paint – If you utilize a PC, your software stack may include Microsoft Paint, a simple raster graphics editor typically included with all versions of Microsoft Windows. The app opens and saves files in Windows bitmap, JPEG, GIF, PNG, and single-page TIFF formats.
Part II: How to Choose Engaging Photos for Your Website
Use High-Quality Photos
This may seem obvious, but defining a high-quality photo is more complex than it first may seem. For a photo to be considered high quality, it should be large, clear, and reflect an engaging subject matter. Large photos immediately draw the eye and demand attention, but if they are out of focus, fuzzy, or not of a compelling subject matter, they won’t meet the definition of “high quality,” even if they take up the full page.
What follows are examples of two photos of similar subjects. Not only is the photo on the right small and pixelated due to its being of low resolution, but it also lacks a single point of focus. The photo on the left is large, bold, beautiful, crisp, and clear, making it a higher-quality photo.

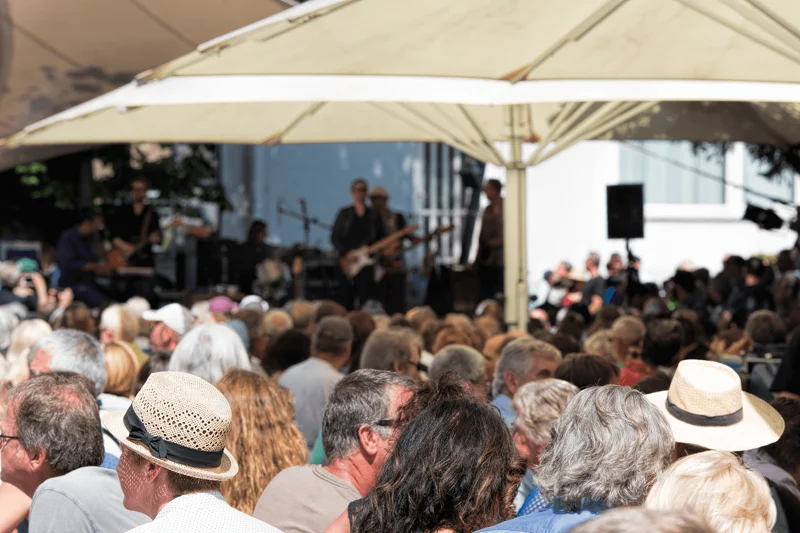
Consider the Composition
The best photos are balanced, demonstrate a clear subject, draw the eye to a logical starting place, and then give your eye a sequential place to travel as it takes in the rest of the photo. Consider the photo below of the event crowd. This image may be a realistic representation of a recent event in a community but consider the composition. There is no central focal point, you can’t see any of the attendees’ faces, which means you can’t decipher their emotions, and your eye has no clear place to go.
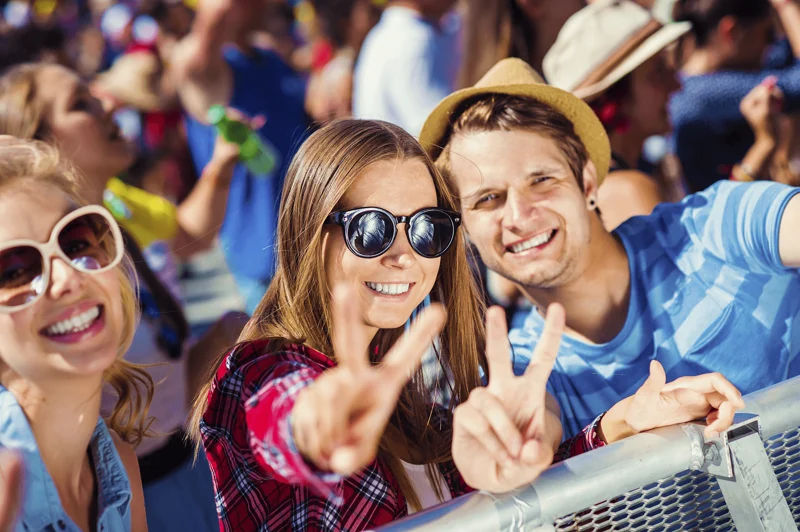
A better option for an event photo is the following. Yes, the focus is on a small number of people, and you can’t see the scale of the event, but this photo is more emotive, and it tells a story. You get a sense from the photo of who some of the attendees were, and how much they enjoyed the event. There is a clear focal point — the smiling couple — and both are looking into the camera, making for a more engaging image (more on eye contact later, too).
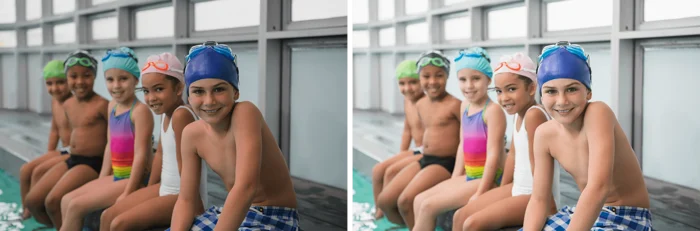
Enhance Simple Photographs
No matter your budget, you will likely have photos taken by staff members at events and out in the community that you want to add to your local government website. Many will likely be captured on a smartphone or simple point-and-shoot camera. For even experienced photographers, unless you’re lucky and capture the perfect photo worthy of the #NoFilter hashtag, adding some simple adjustments and filters to your photo can enhance the color and brightness to take it from a good photo to a great photo. See the example images below as a reference.
Not only do most smartphones have built-in filters in the Photos app to make easy adjustments to photos, but there are several free online tools to help novice photo editors. Click here for the best-free-online-photo editor for a list of the best online photo editors from Techradar.
Make Sure It’s Relevant
The photo you place on a web page needs to correlate to the rest of the content on the page, whether it be text, a form, a calendar, or any other form of interactive material. Using a photo that is simply beautiful is not enough. To ensure a cohesive message and visual experience for the visitor, ensure the photo being used relates to the purpose of the page.
For example, the images below are from James City County, Virginia. Clicking on the City’s “Things to Do” link takes you to a page with a rotating photo gallery of recreation activities in the city, while clicking on the “Fire” page displays local images of the City’s fire department. The use of corresponding photos and text content ensures the visitor immediately knows he has found the information he was searching for and provides a more memorable experience.
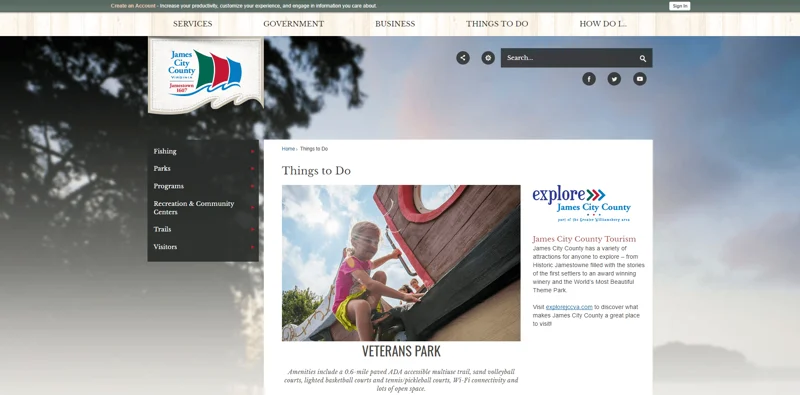
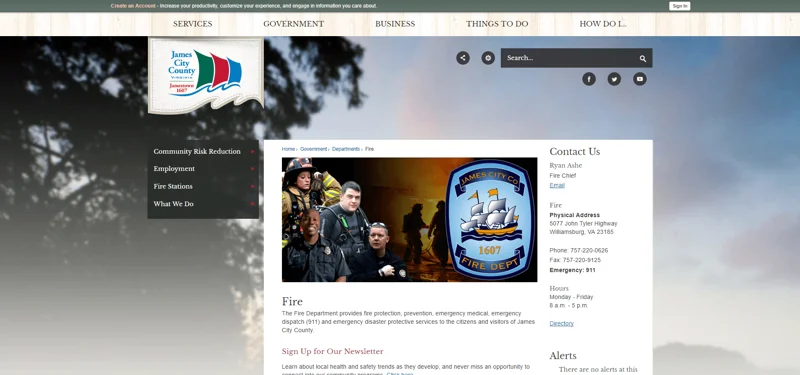
On the contrary, had the City used a picture of an iconic City landmark on the Fire page or a beautiful but generic photo of City Hall on the Things to Do page, it would fail to produce similar, quality reactions.
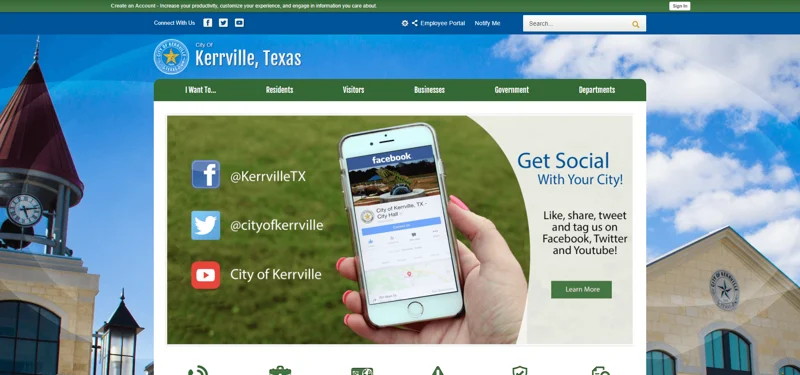
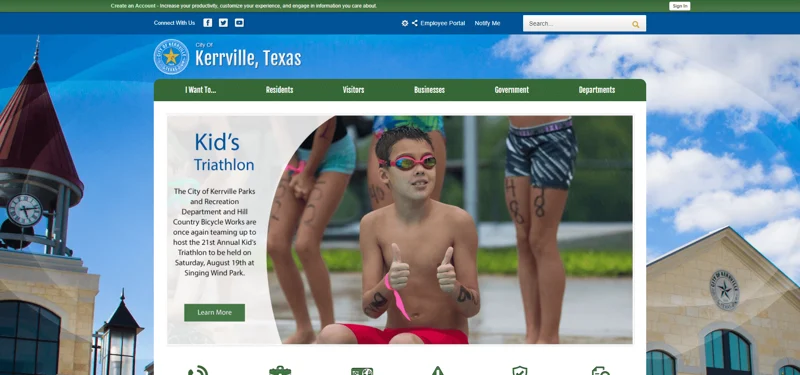
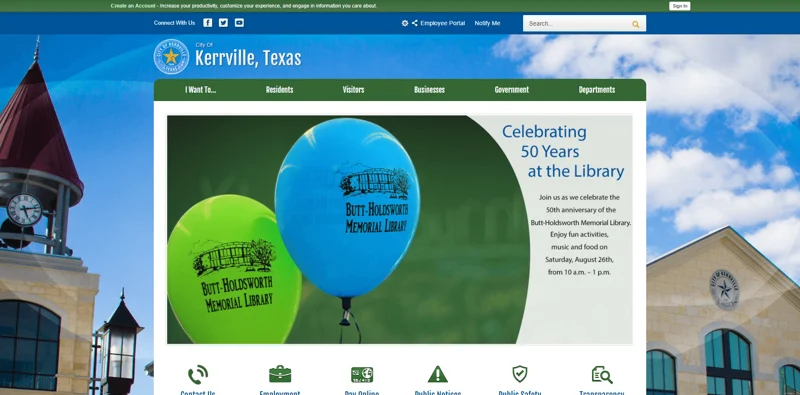
Use Photos as Content that Causes the Viewer to Act
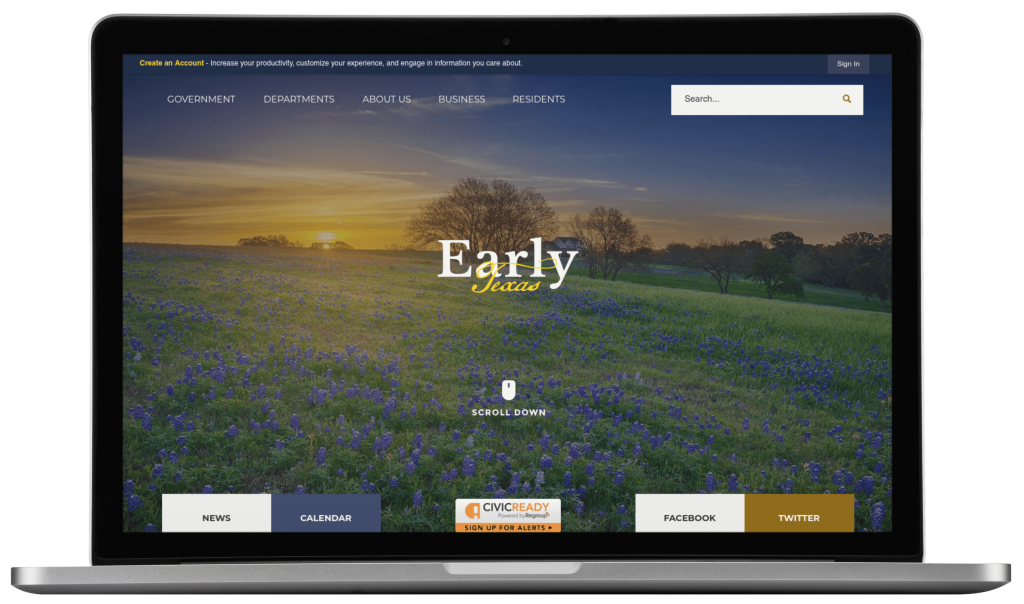
This best practice is especially important for the photos used on your homepage. You can use a photo as content to communicate important information and encourage a response from the visitor. The response may be clicking to learn more or signing up for an event.
For example, the City of Kerrville, Texas, uses a scrolling image banner on the homepage of its city website to communicate important information and encourage visitors to take action, such as following the city on social media, signing up for the kid’s triathlon, and attending the library’s 50th anniversary party.
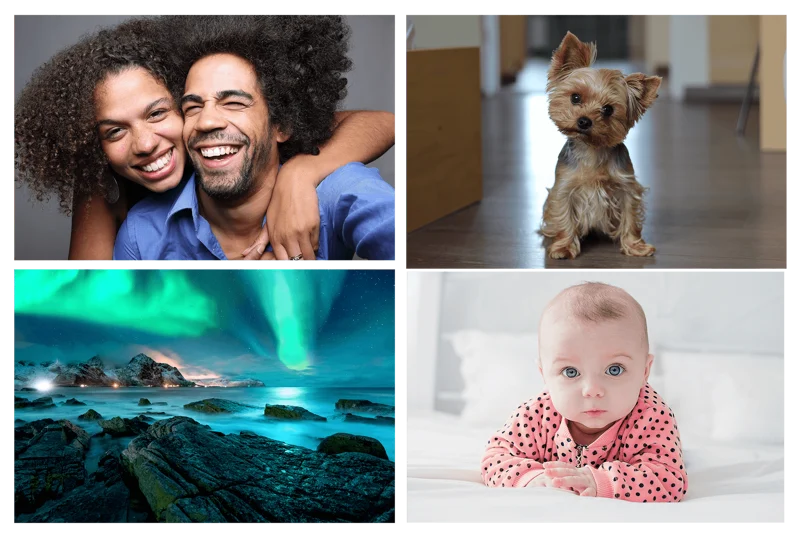
Choose Emotive Photos
Emotive photos should instantaneously conjure a feeling, sensation, or emotion, whether it be amusement, happiness, intrigue, or even anger. Some of the most emotive photos are ones where a single subject is dominant, their eyes are looking into the camera (and by extent the viewer), and their facial expression, position, or context is startling in some way. Close-up photos of people making eye contact with the viewer immediately grab our attention and can instantly illicit an emotion, making them powerful creative tools. Pictures of babies, pets, people interacting with one another in meaningful ways, and impressive elements of nature can also be extremely emotive. See below for examples of each.
Do Not Use Fully Blurred Photos as Your Main Imagery
As our final piece of advice, don’t use a purposely blurred photo as your main hero image. Sometimes blurred photos can serve as decorative background images, but they can be disconcerting to the viewer or make them wonder if the image didn’t load properly.

Written by
CivicPlus